Table of Contents
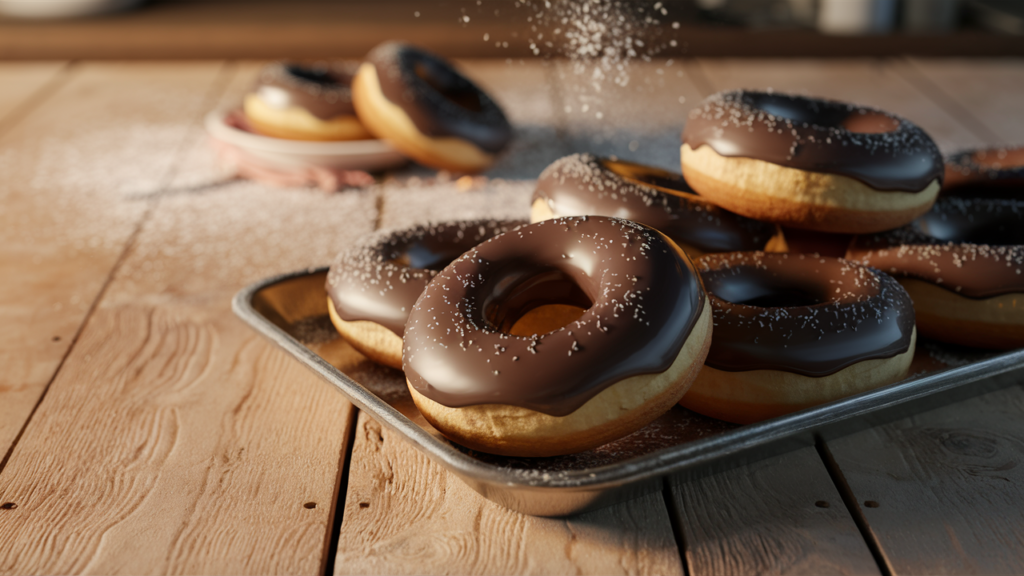
Who doesn’t love the irresistible aroma of freshly fried donuts wafting through the kitchen? 🍩 As a self-proclaimed donut enthusiast, I’ve spent years perfecting my chocolate glazed donut recipe, and today, I’m thrilled to share it with you! Trust me when I say, once you’ve tasted these heavenly rings of joy, you’ll never look at store-bought donuts the same way again.
But here’s the thing: making the perfect chocolate glazed donut isn’t just about following a recipe. It’s an art form. From selecting the right ingredients to mastering the frying technique, every step matters. And don’t even get me started on the glaze! 😍 That’s why I’ve decided to break down my fool-proof method, sharing all the tips and tricks I’ve learned along the way.
In this blog post, I’ll guide you through every stage of creating these delectable treats. We’ll cover everything from the essential ingredients and equipment you’ll need, to the secrets of preparing the perfect dough and achieving that golden-brown perfection in the fryer. Plus, I’ll reveal my special recipe for a chocolate glaze that’s so good, you might be tempted to eat it by the spoonful! So, grab your apron, and let’s dive into the wonderful world of homemade chocolate glazed donuts!
Ingredients for Perfect Chocolate Glazed Donuts

A. Donut dough essentials
When I make chocolate glazed donuts, I always start with the perfect dough. Here’s what I use:
- 2 1/4 cups all-purpose flour
- 1/3 cup granulated sugar
- 2 tsp baking powder
- 1/4 tsp salt
- 1 large egg
- 3/4 cup milk
- 2 tbsp unsalted butter, melted
- 1 tsp vanilla extract
These ingredients create a soft, fluffy dough that fries up beautifully. I’ve found that using room temperature ingredients helps achieve the best texture.
B. Chocolate glaze components
For that irresistible chocolate glaze, I rely on:
- 1/2 cup unsalted butter
- 1/4 cup whole milk
- 1 tbsp light corn syrup
- 2 tsp vanilla extract
- 4 oz semi-sweet chocolate, chopped
- 2 cups powdered sugar, sifted
This combination results in a rich, glossy glaze that sets perfectly on the donuts.
C. Optional toppings and garnishes
To add some extra flair, I like to use:
| Topping | Flavor Profile |
|---|---|
| Sprinkles | Colorful and fun |
| Chopped nuts | Crunchy texture |
| Coconut flakes | Tropical twist |
| Sea salt | Sweet-salty balance |
These toppings not only enhance the appearance but also add interesting flavors and textures to my chocolate glazed donuts.
Now that we have our ingredients ready, let’s move on to the equipment and tools we’ll need to bring these delicious donuts to life.
Equipment and Tools Needed

Mixing bowls and utensils
When I make chocolate glazed donuts, I always start by gathering the right equipment. For mixing, I use a large stainless steel bowl for the dry ingredients and a medium-sized one for the wet ingredients. I find that a wooden spoon works best for initial mixing, but I also keep a whisk handy for smooth blending.
Donut molds or cutters
To shape my donuts, I use two types of cutters:
- A 3-inch round cutter for the outer circle
- A 1-inch cutter for the center hole
If you don’t have cutters, here’s a quick hack I use:
| Household Item | Size | Use |
|---|---|---|
| Drinking glass | 3-inch diameter | Outer circle |
| Bottle cap | 1-inch diameter | Inner circle |
Frying equipment
For frying, I rely on:
- A deep, heavy-bottomed pot
- A candy thermometer to monitor oil temperature
- Long-handled tongs or a slotted spoon for safe handling
Glazing tools
When it comes to glazing, I keep it simple:
- A wide, shallow bowl for the glaze
- A wire rack set over a baking sheet to catch drips
- Parchment paper for easy cleanup
With these tools at hand, I’m ready to create perfect chocolate glazed donuts every time. Next, I’ll walk you through the process of preparing the donut dough, where all these tools come into play.
Preparing the Donut Dough

Mixing dry ingredients
I always start by sifting together the dry ingredients. This crucial step ensures a smooth, lump-free dough. Here’s my go-to mix:
| Ingredient | Amount |
|---|---|
| All-purpose flour | 2 cups |
| Granulated sugar | 1/4 cup |
| Baking powder | 2 tsp |
| Salt | 1/4 tsp |
Sifting aerates the flour, making the donuts lighter and fluffier.
Combining wet ingredients
In a separate bowl, I whisk together:
- 2 large eggs
- 3/4 cup milk
- 2 tbsp melted butter
- 1 tsp vanilla extract
The key is to beat these until they’re well combined and slightly frothy.
Kneading and resting the dough
Now, I gradually add the wet ingredients to the dry mix, stirring until just combined. I turn the dough onto a floured surface and knead gently for about 2 minutes. Overworking can make tough donuts, so I’m careful not to overdo it.
After kneading, I cover the dough with a clean kitchen towel and let it rest for 30 minutes. This allows the gluten to relax, making the dough easier to shape.
Shaping the donuts
With the dough rested, I roll it out to about 1/2 inch thickness. Using a donut cutter or two round cookie cutters (one large, one small for the hole), I cut out the donut shapes. I re-roll the scraps to make use of all the dough.
Now that the donuts are shaped, they’re ready for frying. The next step is crucial for achieving that perfect golden-brown exterior.
Frying the Donuts to Golden Perfection

A. Heating the oil
When it comes to frying donuts, getting the oil temperature right is crucial. I always heat my oil to 350°F (175°C) for the perfect golden-brown exterior. Here’s a quick guide to oil temperatures:
| Temperature | Result |
|---|---|
| Below 325°F | Greasy, undercooked |
| 350°F | Perfect golden-brown |
| Above 375°F | Dark outside, raw inside |
I use a deep-fry thermometer to monitor the temperature accurately. It’s essential to maintain a steady heat throughout the frying process.
B. Frying technique for even cooking
To ensure my donuts cook evenly, I follow these steps:
- Gently lower the donut into the oil using a slotted spoon
- Fry for 45-60 seconds on each side
- Flip only once to avoid excess oil absorption
- Cook in small batches to maintain oil temperature
I always keep a close eye on the donuts as they fry. The key is to achieve that perfect golden-brown color without overcooking.
C. Draining excess oil
After frying, it’s crucial to remove excess oil to keep the donuts crispy and not greasy. Here’s my method:
- Remove donuts from oil with a slotted spoon
- Place on a wire rack over a baking sheet
- Let cool for 1-2 minutes before glazing
This draining process ensures that my chocolate glaze adheres perfectly to the donut surface. Now that we’ve mastered the frying technique, let’s move on to creating that irresistible chocolate glaze that will take these donuts to the next level.
Creating the Irresistible Chocolate Glaze

Melting chocolate
Now that our donuts are perfectly fried, it’s time to create that irresistible chocolate glaze. I always start by melting high-quality chocolate. Here’s my foolproof method:
- Chop the chocolate into small, uniform pieces
- Use a double boiler or a heatproof bowl over simmering water
- Stir occasionally until smooth and glossy
| Chocolate Type | Melting Temperature |
|---|---|
| Dark chocolate | 113°F – 120°F |
| Milk chocolate | 104°F – 115°F |
| White chocolate | 100°F – 110°F |
Adding cream and butter
Once the chocolate is melted, I slowly incorporate warm heavy cream and softened butter. This combination adds richness and shine to the glaze. Here’s my process:
- Heat the cream until it’s just warm (not boiling)
- Gradually pour the cream into the melted chocolate, stirring constantly
- Add small cubes of softened butter, one at a time, stirring until fully incorporated
Achieving the right consistency
The key to a perfect glaze is getting the consistency just right. I aim for a smooth, pourable texture that coats the donuts beautifully. Here are my tips:
- If the glaze is too thick, I add a little more warm cream
- If it’s too thin, I incorporate more melted chocolate
- I always test the glaze on a spoon before using it on the donuts
Remember, the glaze will thicken slightly as it cools, so I make it a touch thinner than I want the final result to be. With this perfect chocolate glaze, my donuts are ready for the next exciting step – glazing and decorating!
Glazing and Decorating Your Donuts

Dipping techniques for even coverage
When it comes to glazing my chocolate donuts, I’ve perfected a few techniques to ensure even coverage. First, I always make sure my glaze is at the right temperature – warm enough to be fluid, but not so hot it runs off. I hold the donut by its edges and dip it face-down into the glaze, giving it a gentle wiggle to ensure full coverage. Then, I lift it out slowly, allowing excess glaze to drip off.
| Technique | Pros | Cons |
|---|---|---|
| Full dip | Even coverage | Can be messy |
| Half dip | Artistic look | Partial coverage |
| Drizzle | Unique patterns | Less control |
Adding toppings while glaze is wet
I love experimenting with toppings to make my chocolate glazed donuts extra special. The key is to add them while the glaze is still wet for better adherence. Here are some of my favorite toppings:
- Chopped nuts (almonds, pecans, peanuts)
- Colorful sprinkles
- Shredded coconut
- Mini chocolate chips
- Crushed candy pieces
I sprinkle these on gently, making sure not to disturb the glaze too much.
Allowing glaze to set
After glazing and decorating, I let my donuts rest on a wire rack. This allows excess glaze to drip off and the glaze to set properly. It usually takes about 15-20 minutes at room temperature. If I’m in a hurry, I might pop them in the fridge for 5-10 minutes, but I prefer the room temperature method for the best texture. Once set, my chocolate glazed donuts are ready to be enjoyed!
Now that we’ve covered the glazing and decorating process, let’s move on to some tips for serving and storing these delicious treats.
Serving and Storing Your Chocolate Glazed Donuts

Best temperature for serving
When it comes to serving my chocolate glazed donuts, I’ve found that room temperature is ideal. The glaze becomes perfectly set, and the donut itself maintains its soft, pillowy texture. However, if you prefer a slightly warm donut, I sometimes pop them in the microwave for about 10 seconds. This gently warms the donut without melting the glaze.
Presentation ideas
I love getting creative with my donut presentations! Here are some of my favorite ways to showcase these delicious treats:
- Stacked donut tower
- Arranged on a vintage cake stand
- Individual donut boxes for gifting
- Paired with coffee or hot chocolate
| Occasion | Presentation Idea |
|---|---|
| Brunch | Tiered platter with fresh fruit |
| Birthday | Donut “cake” with candles |
| Office | Box assortment with variety of toppings |
| Wedding | Donut wall display |
Storage tips for maintaining freshness
To keep my homemade chocolate glazed donuts fresh, I follow these simple storage tips:
- Allow donuts to cool completely before storing
- Store at room temperature in an airtight container
- Place parchment paper between layers to prevent sticking
- Consume within 1-2 days for best quality
For longer storage, I freeze unglazed donuts for up to 3 months. When ready to eat, I thaw them at room temperature and then add the glaze. This way, I can enjoy fresh-tasting donuts anytime!
Now that you know how to serve and store your chocolate glazed donuts, let’s address some frequently asked questions about this delicious treat.
FAQ

Can I bake these donuts instead of frying them?
While frying is the traditional method for making donuts, you can certainly bake them for a healthier alternative. Here’s a quick comparison:
| Method | Texture | Flavor | Calories |
|---|---|---|---|
| Fried | Crispy outside, fluffy inside | Rich, indulgent | Higher |
| Baked | Cake-like, less crispy | Lighter, less oily | Lower |
To bake, preheat your oven to 350°F (175°C) and use a donut pan. The baking time will be about 10-12 minutes.
How long do homemade chocolate glazed donuts stay fresh?
I recommend consuming homemade donuts within 1-2 days for the best taste and texture. Store them in an airtight container at room temperature. If you need to keep them longer, here’s a list of storage options:
- Room temperature: 1-2 days
- Refrigerator: 3-4 days
- Freezer: Up to 3 months (glaze separately after thawing)
Can I make the dough ahead of time?
Yes, you can prepare the dough in advance. After kneading, place it in a greased bowl, cover with plastic wrap, and refrigerate for up to 24 hours. Let it come to room temperature before shaping and frying.
What’s the secret to a shiny chocolate glaze?
The key to a glossy glaze is using the right ingredients and technique. Here are my tips:
- Use high-quality chocolate
- Add a touch of corn syrup for shine
- Ensure proper temperature when glazing
I hope this chocolate glazed donut recipe has inspired you to create your own batch of delicious, homemade treats. From gathering the ingredients to perfecting the frying technique and creating that irresistible chocolate glaze, every step is an opportunity to infuse your donuts with love and care.
Remember, practice makes perfect when it comes to making donuts. Don’t be discouraged if your first attempt isn’t picture-perfect – each batch will be better than the last. So go ahead, roll up your sleeves, and dive into the wonderful world of donut-making. Your taste buds (and your lucky friends and family) will thank you for it!
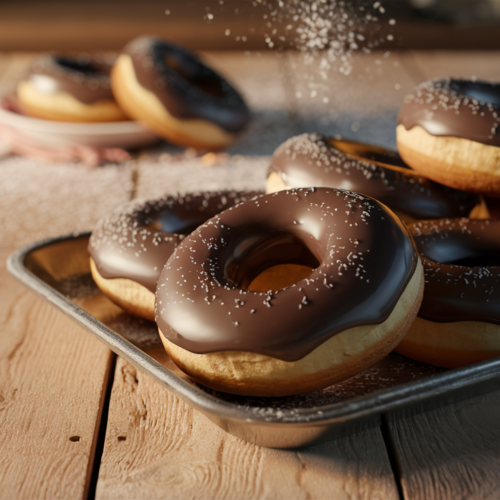
Chocolate Glazed Donut Recipe
Ingredients
Donut Dough:
- 1/4 cups all-purpose flour
- 1/3 cup granulated sugar
- 2 tsp baking powder
- 1/4 tsp salt
- 1 large egg
- 3/4 cup milk
- 2 tbsp unsalted butter, melted
- 1 tsp vanilla extract
Chocolate Glaze
- 1/2 cup unsalted butter
- 1/4 cup whole milk
- 1 tbsp light corn syrup
- 2 tsp vanilla extract
- 4 oz semi-sweet chocolate, chopped
- 2 cups powdered sugar, sifted
Optional Toppings
- Sprinkles
- Chopped nuts
- Shredded coconut
- Sea salt
Instructions
- Mixing Dry Ingredients: Sift flour, sugar, baking powder, and salt into a large mixing bowl.
- Combining Wet Ingredients: Whisk together eggs, milk, melted butter, and vanilla extract.
- Making the Dough: Gradually add wet ingredients to dry, stir until combined. Knead for 2 minutes.
- Resting the Dough: Cover the dough and let it rest for 30 minutes.
- Shaping the Donuts: Roll out dough to 1/2 inch thickness and cut using donut cutters.
- Frying the Donuts: Heat oil to 350°F (175°C), fry donuts for 45-60 seconds per side. Drain on a wire rack.
- Making the Chocolate Glaze: Melt chocolate, stir in warm milk, butter, corn syrup, and powdered sugar until smooth.
- Glazing the Donuts: Dip donuts into glaze and add toppings while wet. Allow glaze to set for 15-20 minutes.
Notes
- For healthier donuts, bake instead of fry.
- Allow glaze to cool slightly for better adhesion.
- Store donuts in an airtight container for up to 2 days.
- Freeze unglazed donuts for longer storage.
Rate this recipe and share your results!
There are no reviews yet. Be the first one to write one.

