Table of Contents
Are you tired of missing out on delicious, freshly baked bread because of your vegan lifestyle? 🍞 I know I was! For years, I struggled to find a vegan bread recipe that could rival the soft, fluffy loaves I remembered from my pre-vegan days. It seemed like every attempt resulted in dense, flavorless bricks that were barely edible.
But don’t worry – I’ve got great news! After countless experiments and a few (okay, maybe more than a few) kitchen disasters, I’ve finally cracked the code to baking the perfect vegan bread. In this post, I’m thrilled to share my fool-proof recipe that will have you whipping up mouthwatering loaves in no time. Trust me, once you try this, you’ll never look back!
Ready to embark on your vegan bread-making journey? Let’s dive in! I’ll walk you through everything you need to know, from the essential ingredients and equipment to step-by-step instructions and troubleshooting tips. We’ll even explore some exciting variations to keep your taste buds dancing. So, tie on your apron and let’s get baking! 👨🍳👩🍳
Essential ingredients for vegan bread

Flour options for perfect texture
When it comes to baking vegan bread, the flour you choose plays a crucial role in determining the texture and flavor of your loaf. I prefer using a combination of flours to achieve the perfect balance. Here are some options I recommend:
- All-purpose flour: A versatile choice that works well for most bread recipes
- Whole wheat flour: Adds a nutty flavor and boosts nutritional value
- Bread flour: Ideal for creating a chewy texture due to its high protein content
- Spelt flour: Offers a slightly sweet taste and is easier to digest for some people
I often use a mix of all-purpose and whole wheat flour for a balanced texture and flavor profile.
Plant-based milk alternatives
To keep my bread dairy-free, I use plant-based milk alternatives. My top choices include:
- Unsweetened soy milk: Provides a neutral flavor and good protein content
- Almond milk: Offers a slightly nutty taste
- Oat milk: Creates a tender crumb and subtle sweetness
Natural sweeteners and flavoring agents
To enhance the flavor of my vegan bread, I incorporate natural sweeteners and flavoring agents. Some of my favorites are:
- Maple syrup
- Agave nectar
- Coconut sugar
- Vanilla extract
- Herbs and spices (like rosemary, thyme, or cinnamon)
Vegan-friendly leavening agents
For my homemade vegan bread to rise properly, I rely on vegan-friendly leavening agents. The most common options I use are:
- Active dry yeast
- Instant yeast
- Baking soda (for quick breads)
- Apple cider vinegar (to activate baking soda)
Now that we’ve covered the essential ingredients, let’s move on to the equipment you’ll need to bake your perfect loaf of vegan bread.
Equipment needed for baking vegan bread

Mixing bowls and utensils
Now that we’ve covered the essential ingredients, let’s talk about the equipment you’ll need to make your vegan bread. I always start with a large mixing bowl – it’s the heart of my bread-making process. I prefer a sturdy stainless steel or glass bowl that can handle vigorous mixing. For utensils, I rely on:
- A wooden spoon for initial mixing
- A rubber spatula to scrape down the sides
- A dough whisk for smoother incorporation
I also keep a stand mixer with a dough hook attachment handy for those days when I want to save some elbow grease.
Baking pans and sheets
For shaping and baking my vegan bread, I use:
- A standard 9×5-inch loaf pan for sandwich bread
- A baking sheet for free-form loaves
- A Dutch oven for artisanal round loaves
I always line my pans with parchment paper to prevent sticking and make cleanup a breeze.
Measuring tools for accuracy
Precision is key in bread making, so I never skimp on measuring tools. My must-haves include:
- Measuring cups for dry ingredients
- Liquid measuring cups
- A set of measuring spoons
- A kitchen scale for the most accurate measurements
With these tools, I ensure consistency in my vegan bread recipes every time. Next, I’ll guide you through the step-by-step process of making delicious vegan bread using these essential pieces of equipment.
Step-by-step vegan bread making process

Mixing dry ingredients
I always start by carefully measuring out my dry ingredients. In a large mixing bowl, I combine the flour, salt, and active dry yeast. For the best results, I use bread flour due to its higher protein content, which gives my vegan bread a better structure. I whisk these ingredients together to ensure they’re evenly distributed.
Combining wet ingredients
In a separate bowl, I mix my wet ingredients. This typically includes warm water, a touch of sugar to feed the yeast, and sometimes unsweetened soy milk for added richness. I make sure the liquid is at the right temperature – too hot and it’ll kill the yeast, too cold and it won’t activate properly.
Kneading techniques for optimal texture
Now comes the fun part – kneading! I gradually add the wet ingredients to the dry and mix until a shaggy dough forms. Then, I turn it out onto a floured surface and begin kneading. Here’s my process:
- Push the dough away with the heel of my hand
- Fold it back over itself
- Give it a quarter turn
- Repeat for about 10 minutes
The dough should become smooth and elastic.
Proofing and rising tips
After kneading, I place the dough in a greased bowl, cover it with plastic wrap, and let it rise in a warm spot. I usually aim for about an hour or until it doubles in size. Once risen, I punch it down, shape it, and place it in a loaf pan for a second rise.
Baking to golden perfection
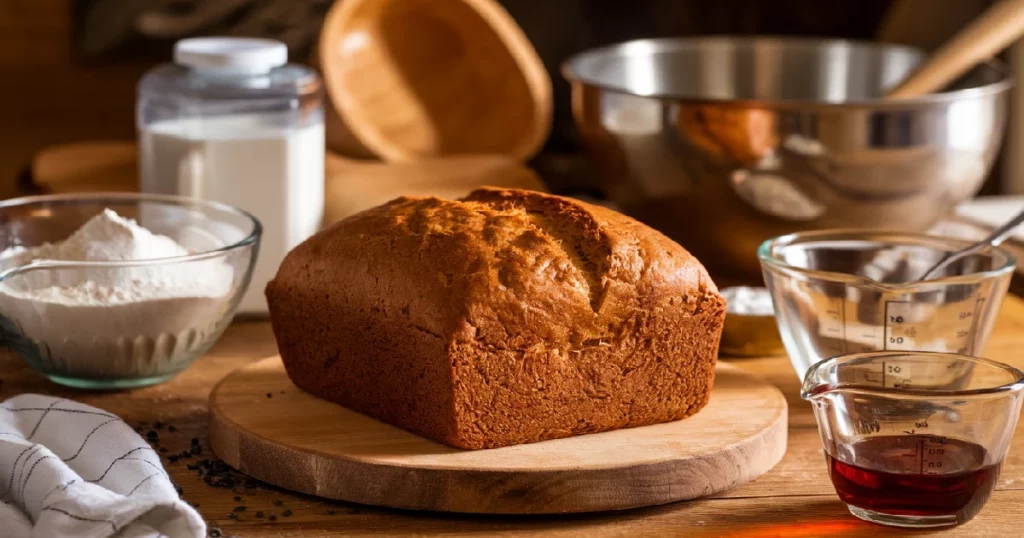
Finally, I preheat my oven and bake the bread until it’s golden brown and sounds hollow when tapped. The aroma that fills my kitchen is simply irresistible! Once done, I let it cool on a wire rack before slicing into my homemade vegan bread.
Troubleshooting common vegan bread issues

Dealing with dense or heavy bread
I’ve encountered this issue many times, and I’ve found that it’s often due to insufficient rising time or using too much flour. To fix this, I make sure to give my dough enough time to rise, usually until it doubles in size. I also measure my flour carefully, using the spoon-and-level method for accuracy. If my bread still turns out dense, I might add a bit more liquid to the dough next time.
Fixing a crumbly texture
When I face crumbly vegan bread, it’s usually because the dough is too dry. To remedy this, I:
- Add more liquid (like unsweetened soy milk) gradually
- Incorporate a bit of oil or vegan butter for moisture
- Knead the dough longer to develop more gluten
These steps help create a more cohesive texture, resulting in a bread that holds together better when sliced.
Addressing uneven rising
Uneven rising can be frustrating, but I’ve learned a few tricks to combat it:
- Ensure even distribution of yeast in the dough
- Shape the loaf carefully, creating tension on the surface
- Score the top of the loaf before baking
- Rotate the pan halfway through baking for even heat distribution
By following these steps, I’ve significantly improved the consistency of my vegan bread’s rise. Now that we’ve tackled these common issues, let’s explore some exciting variations and flavor enhancements to take your vegan bread to the next level.
Variations and flavor enhancements

Adding nuts and seeds for crunch
I love experimenting with different textures in my vegan bread, and adding nuts and seeds is a fantastic way to achieve that satisfying crunch. Here are some of my favorite options:
- Chopped walnuts or pecans for a rich, earthy flavor
- Sunflower seeds or pumpkin seeds for a nutty taste
- Flaxseeds or chia seeds for added nutrition and texture
When incorporating these ingredients, I usually add about 1/2 to 1 cup per loaf, depending on personal preference. I fold them into the dough just before the final rise to ensure even distribution.
Incorporating dried fruits for sweetness
To add a touch of natural sweetness and chewy texture to my vegan bread, I often turn to dried fruits. Some delicious options include:
- Raisins or currants for classic flavor
- Chopped dates or figs for a Mediterranean twist
- Dried cranberries or blueberries for a tart kick
I typically use about 1/2 cup of dried fruit per loaf, soaking them in warm water for 10 minutes before adding to the dough. This helps prevent them from absorbing too much moisture during baking.
Experimenting with herbs and spices
Adding herbs and spices is my secret weapon for creating unique and flavorful vegan bread. Here are some combinations I love:
- Rosemary and garlic for a savory Italian-inspired loaf
- Cinnamon and nutmeg for a warm, comforting bread
- Turmeric and black pepper for a golden, spicy twist
I usually start with 1-2 teaspoons of dried herbs or 1 tablespoon of fresh herbs per loaf. For spices, I begin with 1/2 teaspoon and adjust to taste. Remember, a little goes a long way!
Now that we’ve explored these exciting variations, let’s move on to how to properly store and serve your delicious vegan bread creations.
Storage and serving suggestions
Proper cooling and slicing methods
After baking my vegan bread to perfection, I always let it cool completely on a wire rack. This step is crucial as it allows the bread to set and prevents a gummy texture. I typically wait about 2-3 hours before slicing. When it’s time to cut, I use a sharp, serrated knife and gentle sawing motions to avoid squishing the loaf.
Keeping vegan bread fresh
To maintain freshness, I store my vegan bread in an airtight container or bread box at room temperature. It usually stays good for 3-4 days. For longer storage, I slice the entire loaf and freeze it. This way, I can easily thaw individual slices as needed.
Delicious serving ideas and pairings
My vegan bread is incredibly versatile. Here are some of my favorite ways to enjoy it:
- Toast slices and top with avocado, tomato, and sprouts for a nutritious breakfast
- Use as a base for vegan grilled cheese sandwiches
- Serve alongside hearty soups or stews for a comforting meal
- Create crostini by toasting thin slices and topping with olive tapenade or vegan pesto
Now that we’ve covered storage and serving, let’s address some frequently asked questions about vegan bread making.
FAQ
Can I use whole wheat flour instead of all-purpose flour?
Absolutely! I often use whole wheat flour in my vegan bread recipes. Keep in mind that whole wheat flour absorbs more liquid, so you may need to adjust the amount of liquid in the recipe. Start by replacing half of the all-purpose flour with whole wheat flour and see how it affects the texture. If you’re happy with the result, you can gradually increase the ratio of whole wheat flour in future batches.
How long does vegan bread stay fresh?
In my experience, homemade vegan bread stays fresh for about 2-3 days when stored properly at room temperature. To maximize freshness, I recommend:
- Allowing the bread to cool completely before storing
- Wrapping it tightly in plastic wrap or storing in an airtight container
- Keeping it away from direct sunlight and heat sources
For longer storage, you can slice the bread and freeze it for up to 3 months.
Why didn’t my bread rise?
If your bread didn’t rise, there could be a few reasons:
- Old or inactive yeast
- Water temperature too hot or too cold
- Not enough kneading time
- Insufficient proofing time
To ensure a good rise, I always use fresh active dry yeast, warm water (about 110°F), knead the dough thoroughly, and allow enough time for proofing. Remember, patience is key when working with yeast doughs!
Now that we’ve covered some common questions, let’s explore some exciting flavor variations to take your vegan bread to the next level.
Baking vegan bread is a rewarding experience that not only yields delicious results but also aligns with a plant-based lifestyle. Throughout this post, I’ve shared the essential ingredients, necessary equipment, and step-by-step process to help you create perfect vegan bread at home. I’ve also covered troubleshooting tips, exciting variations, and storage suggestions to ensure your bread-making journey is a success.
I encourage you to embrace the art of vegan bread baking and experiment with different flavors and techniques. Whether you’re a seasoned baker or just starting out, there’s always room for creativity and growth in the kitchen. Remember, practice makes perfect, so don’t be discouraged if your first attempts aren’t flawless. With time and patience, you’ll be crafting mouthwatering vegan bread that rivals any bakery. So, roll up your sleeves, preheat that oven, and let’s get baking!
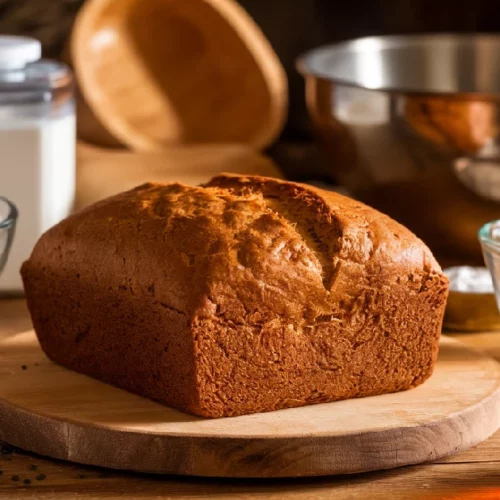
Vegan Bread Recipe
Ingredients
- Bread flour or all-purpose flour
- Whole wheat flour optional for mixing
- Active dry yeast
- Salt
- Warm water
- Sugar to feed yeast
- Unsweetened soy milk
- Oil or vegan butter
Instructions
- Mix dry ingredients (flour, salt, yeast)
- Combine wet ingredients (warm water, sugar, soy milk)
- Mix wet and dry ingredients until shaggy dough forms
- Knead for 10 minutes
- First rise in greased bowl (1 hour)
- Punch down and shape
- Second rise in loaf pan
- Bake until golden brown and hollow-sounding
Notes
- Experiment with flavor by adding nuts, seeds, or dried fruits.
- Ensure proper proofing to avoid dense bread.
- Store in an airtight container or freeze for longer freshness.
Rate this recipe and share your results!
There are no reviews yet. Be the first one to write one.

